In Ubuntu you may wish to stop or start the Gnome desktop and still access TTY’s. For example if you are running the box as a web server then while you may like the ease of use offered by the GUI you don’t want to incur the overhead of the GUI when running Apache/MySQL. So after doing all the mods you leave Apache running but turn the Gnome Desktop off.
To access a TTY hit ctrl-alt-F3
Or any of the other 4 (in total) TTY’s hit ctrl-alt-F3 to F6
To turn off the GUI
sudo service gdm stop
That’s it. The GUI is dead
To restart it
sudo service gdm start
In the old days (aka Ubuntu 16.04 and before) ctrl-alt-F1 through to F6 opened TTY’s. Now though in 22.04 (unsure about 20.04) it’s ctrl-alt-F3 to F6. But whatever the level of Ubuntu you are running Gnome Desktop stop start commands are the same.
Ctrl-alt-F2 takes you back to the GUI (if it’s running)
Ctrl-alt-F1 takes you back to the GUI log in screen (if the GUI is running)
You don’t have to stop or start the Gnome desktop to access any of these TTY’s. They are always there and always available. If you have accessed one and you want to return to the Gnome Desktop simply its just ctrl-alt-F2
If you want to go to the Gnome Desktop login screen and (say) login as another user it’s ctrl-alt-F1.
You can actually turn off the Gnome Desktop from a TTY you have opened within the Desktop itself (aka ctrl-alt-t or right-click and select open terminal). Then, while the Desktop will die, you will be left with a blank screen not at a TTY. If you do this you can get to a TTY by using ctrl-alt-F3 through to ctrl-alt-F6
If you do ctrl-alt-F1 or ctrl-alt-F2 and the desktop is not running you will just get a blank screen. Use ctrl-alt-F3 through to ctrl-alt-F6 to recover.
I needed to do this help a friend debug a problem he had with Marlin code. Normally I try and avoid IDE’s other than Eclipse but in this case there does not seem a great deal of integration for Eclipse with Marlin and it was more important to get bug chasing
I cam across a number of poorly documented hurdles getting this set up for Marlin (2.1). Depending on how long it is since this got published then some/all of these issues may have gone away.
Once downloaded you can easily install the thing on 22.04 by right clicking on the download deb file and then select “Open with other application” then select “Software Install” and you are away.
Alternatively, you can do this on the command line with:
sudo apt install ~/Downloads/filename.deb
You should end up with an icon in your Programming dropdown from the Applications menu top left of the Gnome desktop. The icon you need to click is obviously Visual Studio Code.
Open you newly installed Visual Studio Code IDE. Click on the extensions icon in the left hand column. It looks like four boxes.
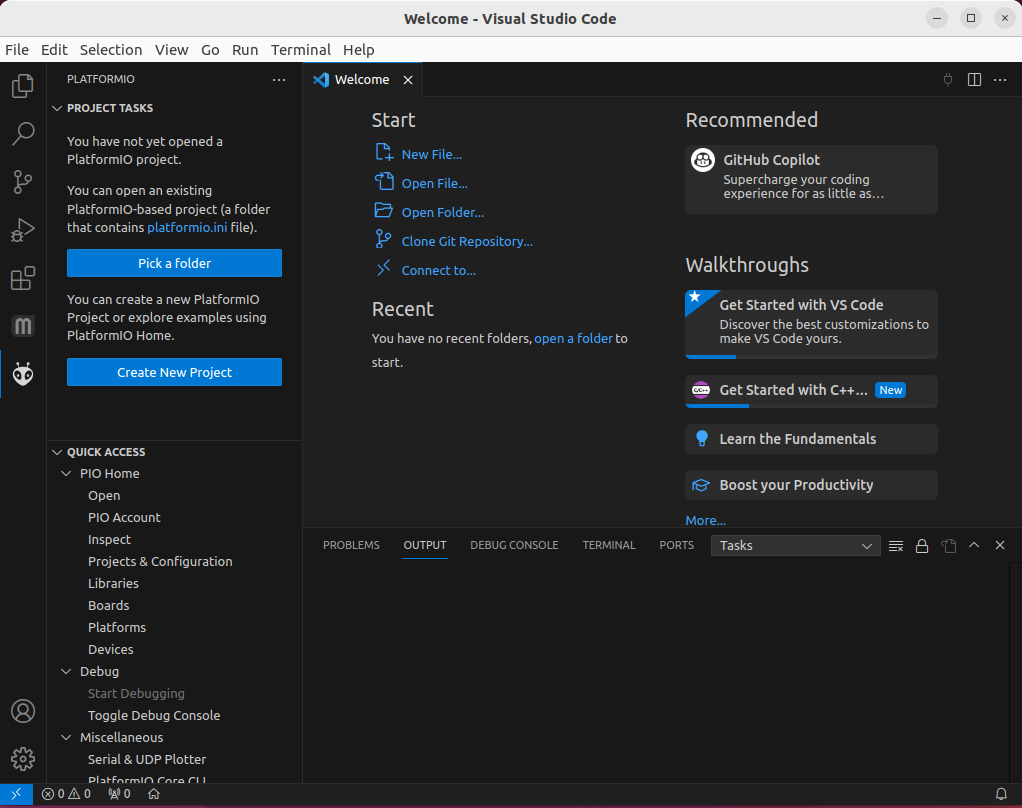
The first view of VSC
Then in the search box type in “Auto Build Marlin” Install it.
You will end up with two new icons on the left hand side. One “M” is Marlin auto build. The one that looks like an alien is actually not yet installed. That’s next. It’s called Platformio. It needs Python. But unfortunately it wont recognise the default Python3 in Ubuntu 22.04. So we have some kerfuffling to do with Python before we can install it. But first close down Visual Studio Code.
Python
If you open a console and type “which python” the system wont find it. That is because on 22.04 you have python3. Type “which python3” and all is well. But that does not help us with Platformio.
If you open Visual Studio Code and try installing Platform IO by clicking the alien icon. It will fail with:
PlatformIO: Can not find working Python 3.6+ Interpreter. Please install the latest Python 3 and restart VSCode.
There were two things I tried to get this working. The first may be redundant or it may be necessary to have along with the second. Either way I only got PlatformIO to install after I had done the second of these.
Close down Visual Studio Code.
The first “fix” was to install this which sorts out an alias for Python3 so it can be invoked with “Python” as well as Python3
sudo apt install python-is-python3
This though still failed with installing PlatformIO. For me it it failed with the same error message. Though now the system could access the Python interpreter as “python” as well as “python3”
This was the bit I added next and was needed to be installed before Platform IO would then itself install.
sudo apt install -y python3-venv
So what is python3-venv? It appears to be a way of creating a multiple of virtual Python environments so keeping, I think, each Python program running with its own clone of the interpreter. But whatever – that solved the problem.
When you’ve done these two installs restart Visual Studio Code and then click on the aliens head. Platform IO should install.
Now we need to set up our MARLIN code
Download it from here… https://marlinfw.org/meta/download/ The latest version for me was a bugfix level but normally I’d go for a stable level.
Unpack the downloaded zip file somewhere you want it.
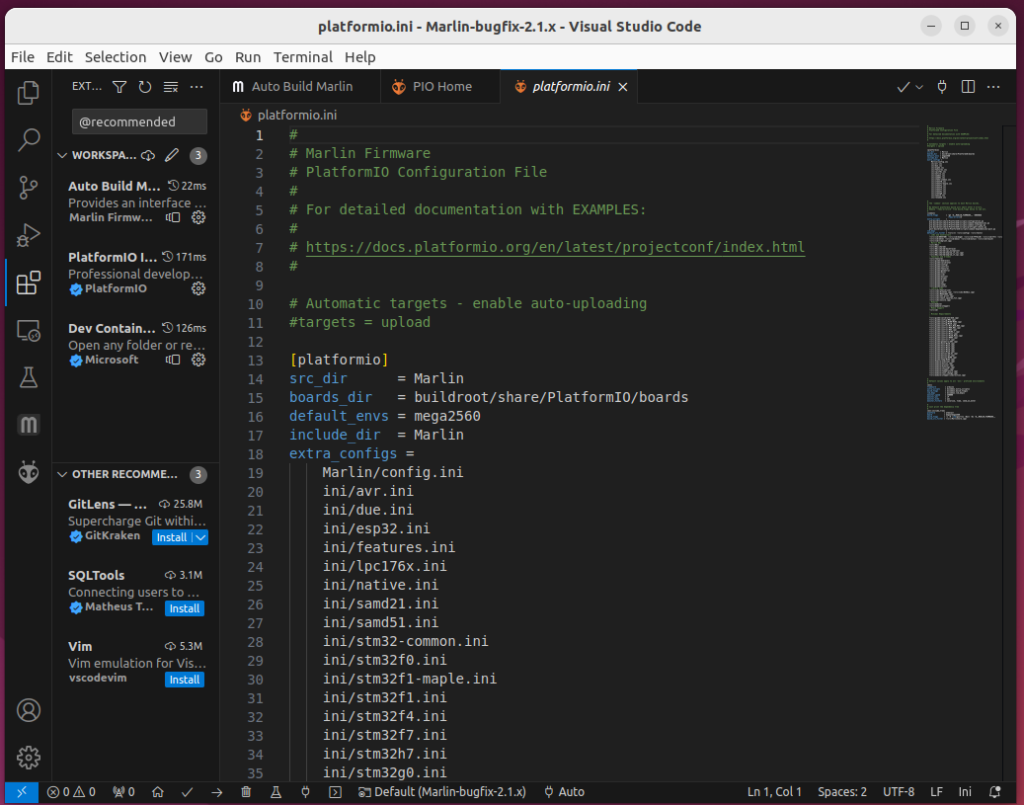
Then in VSC click on the Aliens head aka open PlatformIO. It will do some initialising in the left hand column then it’ll look like this.
Click on “Pick a Folder” and point it at your Marlin code you just unzipped. Then Platform IO will start configuring the project. There’s also, for me, an opportunity to install “Dev Containers” from Microsoft. I waited until the PlatformIO had completed configuring the project then took my life in my hand and installed the “Dev containers”. It installed and I then closed the resulting window on it. Leaving me with this…
Visual Studio Code ready to debug Marlin
Of course we will need to modify the config files etc in the code. But first just to make sure the whole thing works go to “AutoBuild” and click build for one of the default environments. It built this is what I get.
At the end, if successful, it opens the newly created directory holding the new files including the “firmware.hex”.
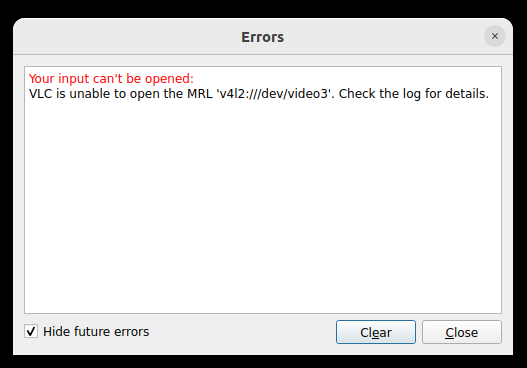
I just bought myself a little USB endoscope for looking into all those difficult to get to places for grand sum of £9.95. The trouble was I couldn’t the damn thing to connect up to VLC on Ubuntu 22.04 (installed as a snap package). In fact I couldn’t even get the built in camera to connect to VLC! All I ever got was errors like this in VLC on Ubuntu 22.04
The dreaded VLC error message when it fails to open a camera.
I looked in in the system log (aka /var/log/syslog). This is what I found:
v4l2 demux error: cannot open device '/dev/video0': Operation not permitted
I tried loads of different thing all to no avail. Then I tried using Cheese, an web cam viewer application that gets bundled in with the standard install of Ubuntu 22.04. That worked fine with my integrated webcam in my laptop but had issues with the USB cam (aka the Endoscope) which cost me a lot of time.
Side Tracked by Cheese
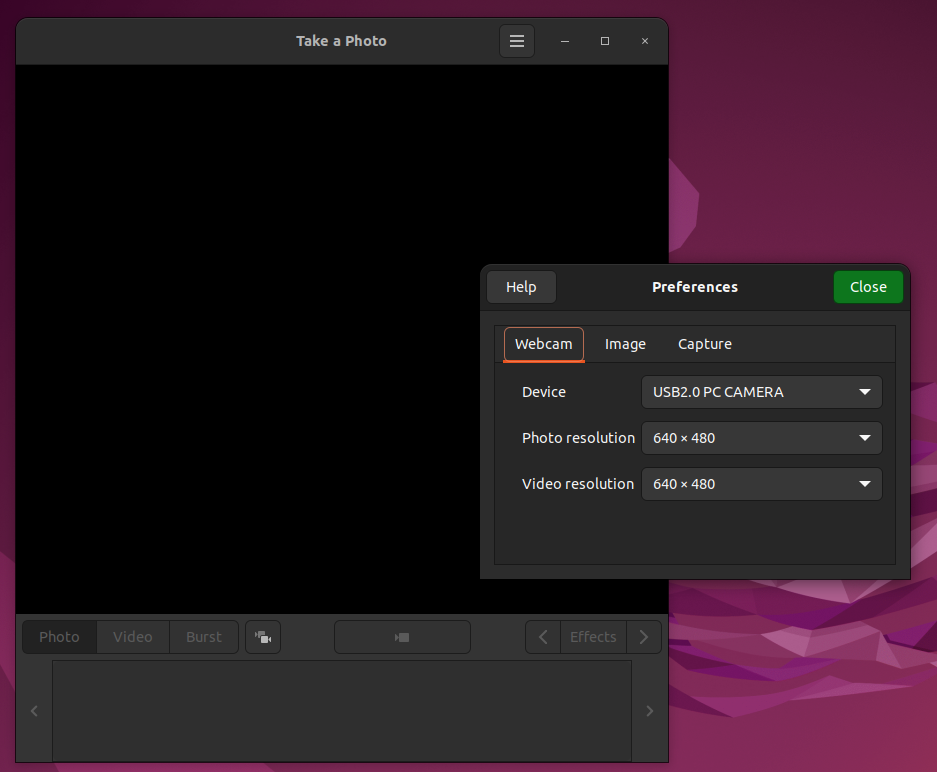
Basically with Cheese if I start it up and the first cam it loads it the integrated cam I can then change over to the USB cam using the preferences menu (which for some bizarre reason lists the USB camera and the integrated camera twice). BUT if you then back out and it tries to load the USB camera first you get this.
Blank Screen with Cheese if USB camera first
I ended up thinking that cheese couldn’t use the USB camera. In fact if I started up with the integrated camera and switched over using the preferences then it worked. So somewhere along the line the integrated camera did some set up needed by the USB camera. I still don’t know what the problem is with Cheese. But if for some reason I wanted to use the USB camera with it instead of the integrated camera I’d have bring up the integrated camera first. Hey Ho.
Back to VLC
Anyway back to VLC. I could not get the damn thing to work at all. I Googled until I must have nearly brought Google’s server farm down. From my googling there were three things I did that fixed the problem. Arguably only the last one is really necessary.
First I added the user (aka chalkie) to the group video like this:
sudo usermod -a -G video chalkie
While that seemed a good idea it didn’t help.
Next I installed a set of tools which though very useful didn’t fix the problem either
sudo apt install v4l-utils
Finally I found a one-liner in a post (at the very bottom) that IMHO fixed the problem. The issue is that my VLC is SNAP package! Canonical Snapcraft have this rather terse webpage on snap packages and how they access cameras. https://snapcraft.io/docs/camera-interface
As a result it does not have permission to access hardware like the integrated camera or the USB camera. So I needed to give VLC permission to link to the cameras. Like this
snap connect vlc:camera :camera
After that VLC could connect to the cameras via the menu media->open capture device->device name. I selected v4l2:/dev/video0 and it worked. Then I tried v4l2:/dev/video1. This failed. Selection v4l2:/dev/video2 selected the second camera. Finally I tried v4l2:/dev/video3. This also failed.
BUT… I had got the damn this to work. (of sorts) I Have no idea why I’ve got four entries yet only two cameras. But never mind. Time for a beer.
The rest of my Linux/Ubuntu posts can be found Here.
I’m not simply talking about deleting files in Linux that the user cannot delete. I’m talking about files that root cannot delete either!
I am playing around with a great little operating system called Porteus (website here). It base around Slackware (the oldest Linux distro) and is both amazingly fast and incredibly small. But I digress. But I came across this problem during my experimentation with Porteus.
Porteus installs on a USB stick and (as you do) I decided to burn it down and re-install. There are two directories one called Porteus and the other (unsurprising) called boot.
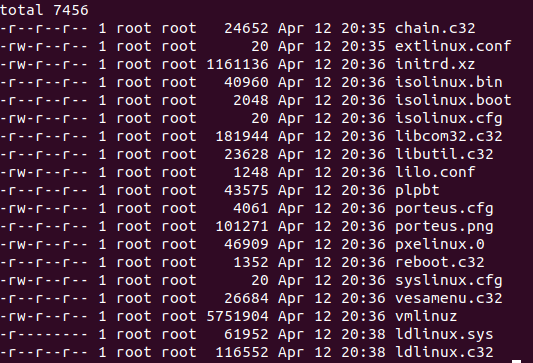
For the life of me I could not delete the boot directory. So I looked in it and then into one of its subdirectories syslinux. Here all but one file could, after fiddling about, be deleted by root. But there was one that could not. Namely ldlinux.sys.
Here’s what this directory looks like in a terminal.
Notice ldlinux.sys. Only the read flag is set for root. This file is also immutable. Until the immutable bit is cleared it cannot be deleted.
In directory syslinux (as you can see) almost all files by default are read-only. This can be fixed by root changing that to rw and then deleting.
BUT… There is one that won’t go and outstays its welcome. ldlinux.sys.
If you look ldlinux.sys is read-only for root and nobody else has access at all. Not even the group – which is root!
Even as root you cannot change the permissions on this file using chmod! It won’t go.
Immutable Files
I Googled this for a while and came across this post on stackexchange (here)
Basically the file has been made immutable. Which means it cannot be changed/deleted/modified by anyone. Including root. Deleting files with the immutable bit set is a no-no.
IBM describe it as so on one of their products: (here)
“An immutable file cannot be changed or renamed. An appendOnly file allows append operations, but not delete, modify, or rename operations.”
So basically, you cannot delete the file. Unless you remove the immutability first.
So there I was. I had gained a strange icon on the task bar on my desktop on Ubuntu 20.04 LTS. It looked like a little red No Entry sign (sorry – I didn’t think to screenshot it). I had an error opening my cache apparently.
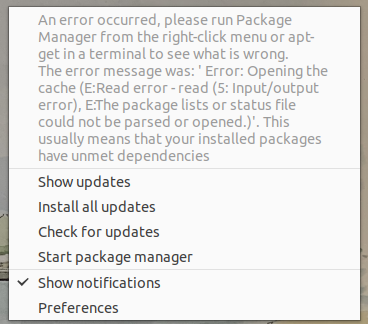
When I clicked the icon I got this.
Package manager error message displayed when error icon clicked on taskbar
The package lists or status file could not be parsed or opened. So I thought I’d be a smart-arse and just do a manual package update, what more could be possibly wanted?
Doom!
Well no. Not Doom. Just irritating. I think the reason I had got into this state was that my machine had apparently locked up the day before. Like an impatient idiot I had forced it to turn off.
I now assume that this was probably while it was in mid flow doing an update. The result being that I managed to inadvertently wreck the status file or the package lists. So any new update failed before it had even started.
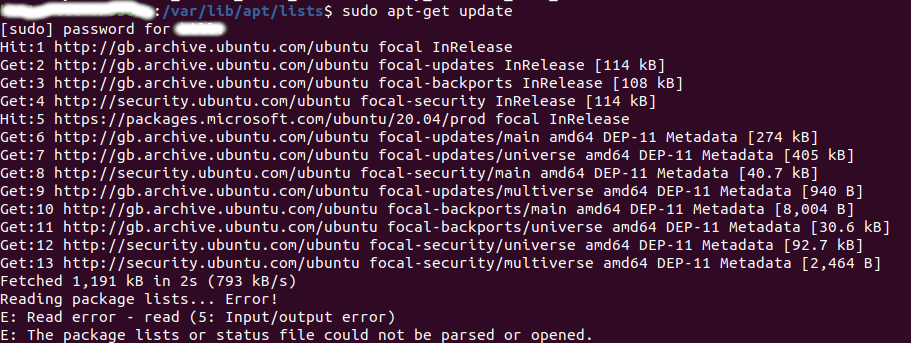
The actual error message from the package manager when I tried running it was this:
E: Read error - read (5: Input/output error)
E: The package lists or status file could not be parsed or opened.
E: _cache->open() failed, please report.
So how to fix this?
There’s lots of stuff all over Google about getting an error on opening the cache. Some of it going back ten years or more. Some is unclear and some contradictory. Other bits out-of-date or just plain wrong. I found a couple of answers that I amalgamated and succeeded in salvaging my machine. So this is what I did and it appears to have worked a treat for me. BUT… Caveat Emptor and all that. (I got the guts of this fix from Here)
First the scary bit. You have to delete all the files under directory /var/lib/apt/lists. But DO NOT delete the lists directory itself. (I didn’t back mine up my broken copy first (because at times I’m an idiot) but if you can maybe you should. After you have (or you decide not to) open a terminal and issue this:
Now finally you might as well do any upgrading to the file set (this does NOT upgrade you to a later version of Ubuntu – just to the latest version of the one your are on)
sudo apt dist-upgrade
Here’s what I got:
chalkie@chalkie-TP550LA:~$ sudo apt dist-upgrade
Reading package lists... Done
Building dependency tree
Reading state information... Done
Calculating upgrade... Done
The following package was automatically installed and is no longer required:
  libxmlb1
Use 'sudo apt autoremove' to remove it.
Try Ubuntu Pro beta with a free personal subscription on up to 5 machines.
Learn more at https://ubuntu.com/pro
The following packages will be upgraded:
  aspnetcore-runtime-6.0 aspnetcore-targeting-pack-6.0 dotnet-apphost-pack-6.0
  dotnet-host dotnet-hostfxr-6.0 dotnet-runtime-6.0 dotnet-runtime-deps-6.0
  dotnet-sdk-6.0 dotnet-targeting-pack-6.0 libfprint-2-2 libfprint-2-tod1
  ubuntu-advantage-tools
12 to upgrade, 0 to newly install, 0 to remove and 0 not to upgrade.
Need to get 124 MB of archives.
After this operation, 2,048 B of additional disk space will be used.
Do you want to continue? [Y/n]
Get:1 http://gb.archive.ubuntu.com/ubuntu focal-updates/main amd64 ubuntu-advantage-tools amd64 27.11.3~20.04.1 [161 kB]
Get:2 http://gb.archive.ubuntu.com/ubuntu focal-updates/main amd64 libfprint-2-2 amd64 1:1.90.2+tod1-0ubuntu1~20.04.9 [212 kB]
Get:3 http://gb.archive.ubuntu.com/ubuntu focal-updates/main amd64 libfprint-2-tod1 amd64 1:1.90.2+tod1-0ubuntu1~20.04.9 [44.6 kB]
.
.
.
Configuring...
--------------
A command is running to populate your local package cache to improve restore speed and enable offline access. This command takes up to one minute to complete and only runs once.
Processing triggers for man-db (2.9.1-1) ...
Processing triggers for libc-bin (2.31-0ubuntu9.9) ...
chalkie@chalkie-TP550LA:~$
Notice the end bit “Configuring…” Personally I took the one minute with a pinch of salt, left it for ten minutes and had a cup of coffee. I just let it run.
And that’s it! The little no-entry sign has vanished and I can now do updates/changes again!
I first came across this WordPress cum Apache2 Permalink 404 problem back in 2018 and described a fix here. Unfortunately I had forgotten all about it and even though the damn fix was sitting right there in front of me I had to re-endure all the grief and suffering again. However during this grief and suffering I came across another nasty little feature that seem associated with the new Block editor. (previously I was using the classic editor) Namely after changing the permalink I got “Updating failed. The response is not a valid JSON response.” whenever I tried changing a post.
I previously wrote up a fix for the 404 problem when you change permalink style here. While it is much the same as this it is here, it is four years old and pre-dates the Block editor. But it may be worth a look along with this in case it somehow explains thing differently and more usefully for you.
This problem (in total) probably only applies to situations where you are using your own Apache2 server. But it may apply in part if you’ve not got the .htaccess file properly configured on some hosted webspace. I would imaging that if you are using a hosting service then it would be highly unlikely you would need the bit below about a2enmod.
I must add that this problem (2nd time ) almost beat me to death. It appeared to be intractable. But that was only because I had failed to configure Apache properly. (or read my own f**king notes!). I didn’t think (until now) that the two issues in Permalink 404’s & Response is not a valid JSON response” were related. But I think they are. Either that or I fluked a fix to both.
Here’s What Happened
Basically I installed WordPress with no issues. I built a child theme, again with no issues. I could build pages and posts using both the Gutenberg and the Classic editor. BUT I could only use the “plain” default URL settings for both posts and pages. If I changed it under settings→permalinks to something a bit more useful I’d end up with a 404 not found.
In the Gutenberg editor I also noticed that I often (always?) got a red bar with the following error message in it..
“Updating failed. The response is not a valid JSON response.”
So if you are a getting this then maybe it is tied up with this permalink problem. Obviously before I started using the Block editor and before I fixed the permalink problem I didn’t get it. After I fixed the permalink problem in apache2 then the JSON invalid response issue I was getting in the Block Editor disappeared too.
So, What was I getting with the unconfigured Apache?
I changed the permalink setting away from the default. Then in the editor the new URL for the post/page looked correct. But it just did not work. It always returned 404 Not Found.
Here’s what I did to solve this (for me) They were not done in this order but I think that this is the best order to do them in. It may also be that not all these steps are needed.
Here’s the Fix
1. In etc/apache2/apache2.conf: change AllowAll=none to AllowAll=All. I did this for all four settings but I think that only the one related to /var/www is necessary. You change all 4 to get it working back out the ones you don’t need by trial and error. I’m pretty sure you only need /var/www
Doing this enables the .htaccess file (more in a minute). Without doing this .htaccess file is simply not read.
2. Turn on mod_rewrite
sudo a2enmod rewrite
(this was the missing bit that killed me for two days. This MUST be done if it’s your own server)
3. Ensure the .htaccess file exists and holds the following code (or similar. In my previous post I used a slightly different incantation but never mind – the standard wordpress version is fine)
I gather it is possible to completely dispense with the htaccess file and simply do everything in apache2.conf. But most people only host a site to develop it and then upload it to a host provider where use of a htaccess file is not optional. So you might as well do it in your prototype code too.
Make sure you htaccess file is writable by www-data as well as the owner.
Restart apache2 after the mods. with sudo service apache2 restart
(or whatever other incantation you like)
That’s it.
Hopefully the permlinks should now work and those hideous Permalink 404’s & Response is not a valid JSON response messages will be history too.
Yes. I committed the cardinal sin. I lost my root password to mysql and phpmyadmin. Consequently I could not log in as root in order to change the permissions for a user. Of course I hadn’t noticed I had lost the damn thing because normally I never-ever log in as root to anything.
It was only when I need to fiddle about with other users when I typed in what I thought it was – only to find my memory was crap. Of course, I had written it down somewhere safe. I always do. The problem was (crap memory again) I couldn’t find where.
I always obfuscate saved passwords – just in case some nasty person raids my desk and steals my documents. So it is probably staring me in the face. On the plus side I suppose it shows my obfuscation works pretty well. Hey Ho.
Check Your Mysql Version
Here’s what I did to reset the lost root password to mysql and phpmyadmin. This worked for me. I’m running mysql ver 8.0.30 Check this with: mysql -V Mine come back with this. mysql Ver 8.0.30-0ubuntu0.20.04.2 for Linux on x86_64 ((Ubuntu)) This may not be compatible with all other versions but I expect it should be with this or later versions.
This method (after trying and failing with many others) is based largely around this post on devanswers.co. So major Hat Tip to them. There are a few extra steps here mainly surrounding clean up before actually changing the password. But if you are running mysql 5 you would probably be better off at devanswers as they deal with that earlier version as well as mysql 8. But you may still want to do the mysql killing and clean up as described here.
If, like me you got to this point after many failed attempts to fix this we need to check what sort of dismal state we are in.
We need to kill mysql. Make absolutely sure it really is dead. It’s worth checking that you haven’t got multiple versions running. This may (especially) happen if you’ve been faffing around with other failed attempts to crack in to mysql (like I had).
Cleanup: Kill all Mysqls
sudo ps -A | grep mysql – if this shows you one or more mysql or mysqld processes running then…. sudo pkill mysql sudo pkill mysqld sudo ps -A | grep mysql – make sure this time nothing comes back.
Now we have to make sure the following directory (and associated user) exists. It may well not.
If you try and push ahead without having this directory properly set you will get something like this: chalkie@chalkies-box:~$ mysql -u root mysql ERROR 2002 (HY000): Can’t connect to local MySQL server through socket ‘/var/run/mysqld/mysqld.sock’ (2) [1]+ Exit 1 sudo mysqld –skip-grant-tables
If you already have this error message START AGAIN. Go back and check ALL instances of mysql are dead THEN create the directory as below.
ls -l /var/run/mysqld If it is not there and the owner is not mysqld:mysqld then… sudo mkdir /var/run/mysqld sudo chown mysql /var/run/mysqld check it again with ls -l /var/run/mysqld
Now restart mysql in safe mode like so.. sudo mysqld_safe –skip-grant-tables& You’ll get something like this back.. [1] 100757 chalkie@chalkies-box:/var/run$ 2022-08-21T12:57:00.853461Z mysqld_safe Logging to ‘/var/log/mysql/error.log’. 2022-08-21T12:57:00.907704Z mysqld_safe Starting mysqld daemon with databases from /var/lib/mysql
now we can login as root like so… sudo mysql –user=root mysql
You now should be logged in as root the prompt should now be mysql>
Now you are logged in as Root
From here you can now do all sorts of damage. Or even change the lost password for root as so..
First remove the old password with this…(notice the trailing semi colons and ignore the mysql> prompt) mysql>UPDATE mysql.user SET authentication_string=null WHERE User=’root’;
mysql>flush-privileges;
mysql>ALTER USER ‘root’@’localhost’ IDENTIFIED WITH mysql_native_password BY ‘a-new-pw-i-promise-never-to-forget’; mysql>flush-privileges;
And that’s it. Log out and kill the safe mode mysql process
mysql>exit; sudo killall -u mysql
Now restart it: sudo /etc/init.d/mysql start CHECK the new password for root works by logging into mysql and/or phpmyadmin with it!!!
I hope that helps. My other Ubuntu style fixes are listed HERE
I had an annoying issue in that I had forgotten where I had placed the image I was using for the background on my Ubuntu Gnome Desktop. For some God-forsaken reason I had set the image in a non standard place and simply couldn’t find it.
So here’s how to find the background image on Ubuntu, wherever that pesky image is.
Open a Terminal (ctrl+Alt+t)
Then at the prompt enter:
gsettings get org.gnome.desktop.background picture-uri
Usually the images are in either the main system repository of /usr/share/backgrounds or locally… /home/username/.local/share/backgrounds [typo corrected – thanks Doug]
But you can put them anywhere (not a good idea imho) But if you want to…
Open the image you want by double-clicking it. Then right click on the image and select “set as wallpaper”. This will set the image as wallpaper BUT will NOT copy it into a sensible location (see above). So, if you forget where it is you really need the gsettings command to find it as I found out the hard way.
The best way to change or find the background image on Ubuntu is by either right clicking on an unused part of the desktop and selecting “Change background” which takes you directly to the setting GUI, or by using the system-tools GUI under under main Applications menu at: Applications->System Tools->Preferences->Background to access the same GUI.
Here you can change the image and/or add new ones. Crucially if you add a new one the image you add is copied to the /home/username/.local/usr/share/background directory and is safe from accidental deletion.
The rest of my Ubuntu How-to’s and Gotch’s are here
I recently went over to using Ubuntu 20.04 from 18.04 and my new FreeCAD installation is now a snap package rather than an installation built using the traditional apt-get install route. I’ve done this for no particular reason other than that is the way thing seem to be going and frankly I just went with the flow. I wanted to get the thing working rather than fuss over how it was installed. But I ran into some Snap package font problems.
I’d used the FreeCAD snap package for a couple of small test projects and all seemed well. Then I decided I needed to make some Christmas lettering on my Trusty Creality Ender 3. To do this all I needed to do was use the ShapeString tool to get the letters from a font on my system. I’ve done this before on Ubuntu 18.04 with a traditionally installed FreeCAD package (See this post). But on Ubuntu 20.04 I hit a road block associated with the FreeCAD snap package.
One of the purposes of the snap packaging format is to limit access to system files. I assume it’s for security reasons and also so the package is not dependent upon a particular system file. This means (as well as enhanced security) that a snap package for Ubuntu should work without issue on any other flavour of Linux as well. That’s the theory anyway.
One problem with this is that Ubuntu/Linux font files are usually in either /usr/share/fonts or /usr/local/share/fonts.
So neither of these system directories are available to the FreeCAD snap package.
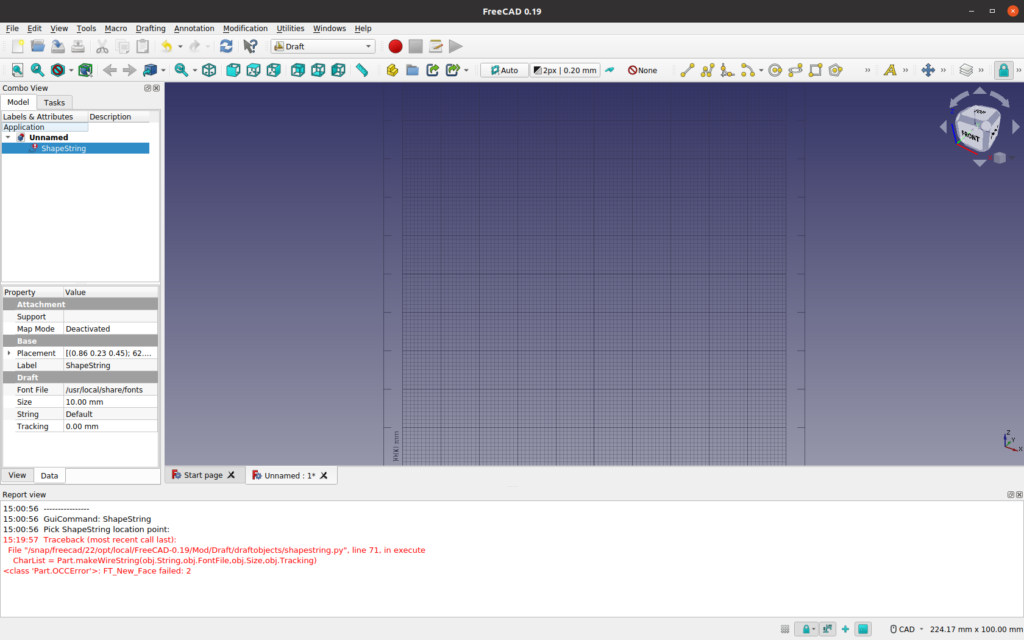
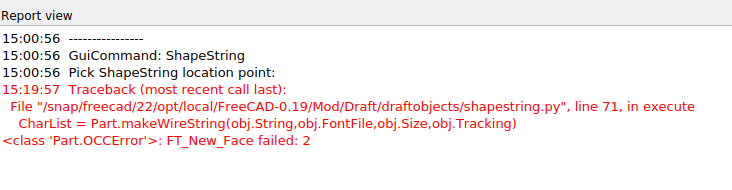
Consequently when you try and set up the path to the font of your choice in the ShapeSting tool you will find that the only directories that are available (the rest are greyed out) are those under your home directory. So, in essence you cannot set up the path to the font! While you can actually manually type in the path into the ShapeString tool, when you hit enter you get this:
Notice I’ve set the path to /usr/share/fonts. It doesn’t like it!Here’s what it actually says at the bottom of the above screen. Yours may be different.
So, how do you access fonts for the ShapeString tool? Well, this below works for me, but I’d be quite happy for anyone to show me a better way.
Basically you have to make the fonts you want to use available from within the bits of the file system that the snap package can see, i.e. anywhere under the user home directory. I’d suggest that it’s best not to copy them directly into the snap package location as you will probably be updating the package sometime and the fonts will be lost if you do that. Instead create (if you don’t have one already) a dot fonts directory (i.e. /home/<user-name>/.fonts) and then copy them in there.
Example:
cd ~ cp -r /usr/share/fonts/msttcorefonts/ ~/.fonts/
So far so good.
Now, go to the FreeCAD snap setup and go to directory:
/home/<user-name>/snap/freecad/current/
In here make soft link to the new fonts directory
ln -s ~/.fonts fonts
Restart FreeCAD
Then when you come to setting up the path to the font of your choice in the ShapeString tool you can now select from anything you have copied into /home/<user-name>/.fonts via the link you have in the freecad setup.
Both of these (actually the same thing!) can be selected using the dialog box associated with setting the font which is triggered by clicking on the three dots next to the font path text box.
After doing the setup you can actually set a default font for the ShapeString tool too. So if you only ever (or mostly) use one font you can set it to that. Otherwise the font path in the ShapeString tool will be blank and need setting up everytime you use it.
Do this by first selecting Draft mode first. If you don’t do this first you won’t be able to set the path for the ShapeString default font.
Now go edit->preferences. You should see a dialog box with “Draft” as the last entry on the left. Click it.
Then select the “Text and Dimensions” tab
Then in the displayed window at the bottom set the Shapestring path to your default font using the three dot navigation tool at the end of the line.
That’s it. Now when you start the ShapeString tool it will load the default font, but you can still replace with another if you want.
I have to say I’m not entirely happy with this as a solution, but it works for me. I hope (failing finding a better solution) it works for you too. If you know a better way to deal with these snap package font problems, I’d love to know what they are.
NOTE: Evidently there is/was a similar problem with the LibreOffice snap, so these Snap package font problems are not just confined to FreeCAD. A suggestion (relating to the LibreOffice problems) was that before copying the fonts to the ~/.fonts directory you run:
sudo fc-cache -fv
This refreshes the cached fonts.
I don’t think that is necessary. Although I doubt if it will do any harm.
So, you want to transfer some files from your phone to your Ubuntu PC using Bluetooth? So did I. In fact I’ve done this setup twice. Both times the painful way.
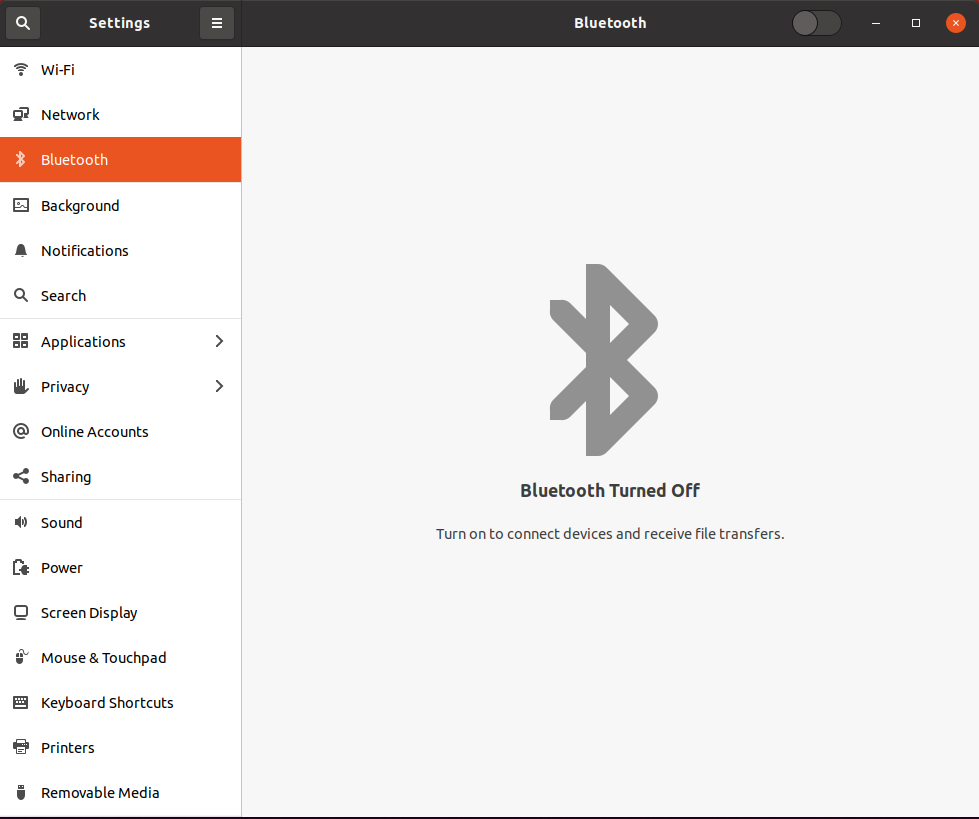
Some years after I’d solved it with my Moto G5, I forgot it was in my shorts. I went swimming with it. Funnily enough it didn’t seem to work too well (or at all) after that. So I bought a new Moto G10. For my sins (which are many) AND because I’d not written it up, I had to go through the whole grief and suffering again. So from the top. Lets start at the default. Bluetooth is off. Go to Settings. Select Bluetooth. You’ll Get to this screen.
NOTE the barely visible switch in the task bar between “Bluetooth” and the “-“
Fine the barely visible slider switch in the task bar of the setting window slide it to on (i.e. to the right)
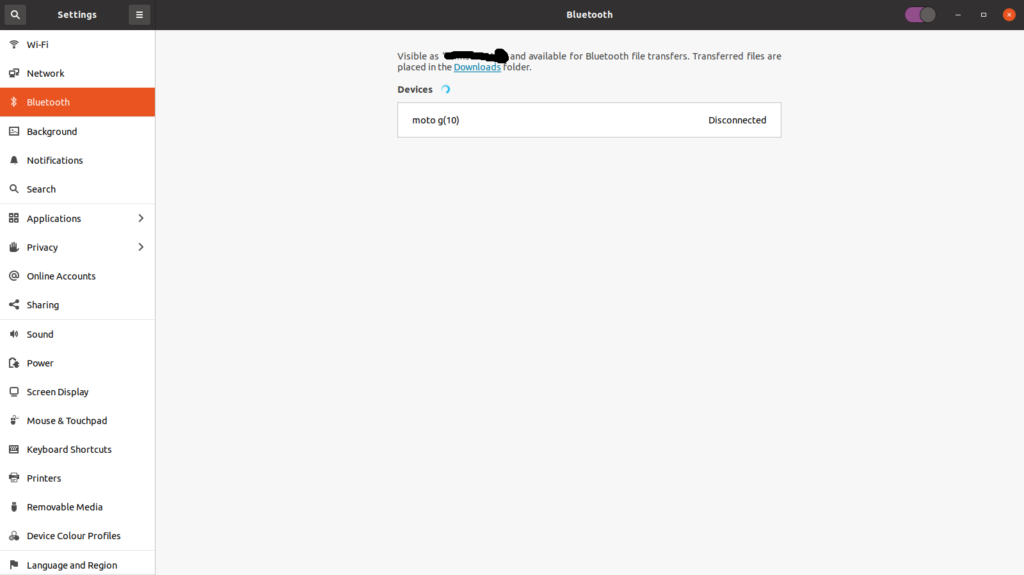
You get this
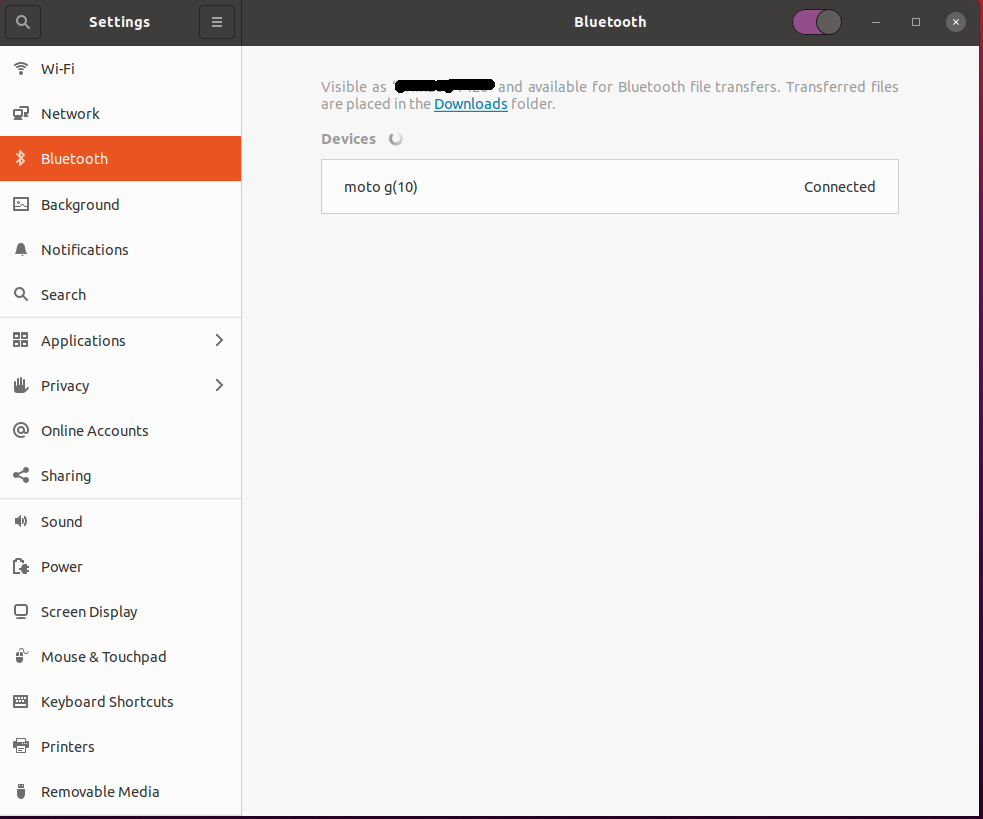
A list of discoverable devices appears. Here’s my new G10
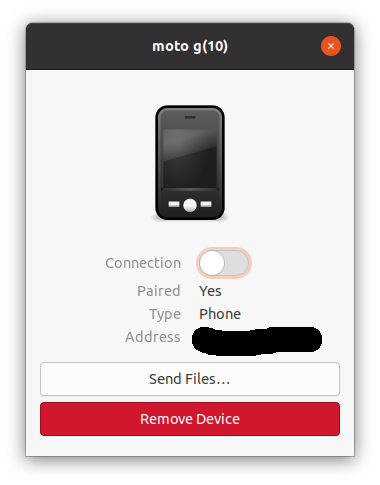
Click on the box with the device you want to connect to in it. This pops up:
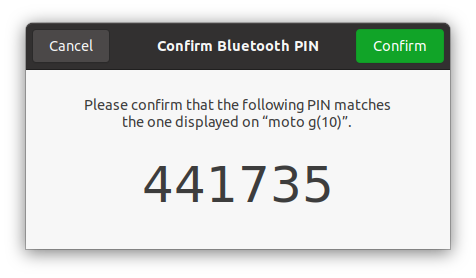
Slide the switch by “Connection” to the right. Then you get a code to compare and affirm that appears on both the PC and the phone. Like this:
You need to hit “Confirm”. As I remember a similar box also appears on the phone and you have to confirm that as well.
But.. I Still Can’t transfer Files to Ubuntu with Bluetooth! Arghhh!…
So Now you have ensured Bluetooth is on. You checked that your phone is registered with Ubuntu.
But still the damn thing won’t let you transfer files to your PC from your phone!
Moreover you get one of those really “useful” error messages on your phone like “transfer failed” . If you dig a little deeper on your phone you get a somewhat expanded error message like “ transfer forbidden by target device” Which at least tips you off that the issue is with your Ubuntu box rather than the android phone.
The problem is trivially simple to solve.
Basically Ubuntu will not allow inbound Bluetooth file transfer UNLESS the Bluetooth settings window is open. Like this one:
If this window is not open on the PC then you won’t be able to transfer in files from your phone.
Yes I know. Somewhat bizarre. But there it is.
And that’s it! Now you can transfer files to Ubuntu with Bluetooth from a phone (or whatever). Note: You have to “push” them from the phone. (i.e.instigate the transfer from the phone after the connection is set-up)
Just to make matters worse, on the (Android) smartphone I have, the Bluetooth option to transfer files outbound from the smartphone is not immediately visible when you hit share – it’s on the next line of icons below (i.e. just off-screen) those that are visible at the bottom of the picture (or whatever) you are sharing. You need to flick up the icons to access the Bluetooth icon. Just be careful when you do this that you don’t accidentally close the window as the two gestures are virtually identical.
Then to round it all off the file transfer takes forever. Its far easier/quicker to stick a USB cable into your phone and take the images off that way.
Hope that helps.
I must say, (Bluetooth connectivity – which should be, by definition, simple) drives me to distraction. I don’t plan going swimming with this phone for a few years so I am hoping these notes make sense when I come to change my phone next time.
The rest of my Ubuntu fixs/gotcha’s/howto’s are HERE
After endless Googling on this problem I noticed that other people had had similar issues with processor overload with YouTube videos. It appears to be relatively rare. But not unknown. I <think> I’ve found a fix. Or more like – A work-round. So if this helps you then great! But this is strictly WYSIWYG.
Let me start off by saying that this is an unsatisfactory fix. I hate it. It appears to work, but I am unhappy with it as it “gets round” the problem rather than solving it. But beggars can’t be choosers…
So, you want to transfer some files from your phone to your Ubuntu PC. But you are getting Bluetooth file Transfer Problems and nothing is getting downloaded to your PC. You have ensured Bluetooth is on. You checked that your phone is registered with Ubuntu. But still the damn thing won’t let you transfer files to your laptop from your phone.
Nothing drives you more mad than buying some new music and then having to struggle to get it to play. This hit me when Rhythmbox was missing new music files I had added to my Music folder on my Ubuntu 18.04 system. I checked the preferences in Rhythmbox and even though the “watch my library” box was ticked, I got no updates.
I had a small image that an artist asked me to blow up to A4 size so they could use it as an aid when painting a portrait. I was using Gimp and print centering was vital to get it all in.
If you install Opera on Ubuntu 18.04 (or 16.04) it all works – except for video playback. When you first install Opera (or upgrade Ubuntu) You (or at least I) get this:
These are my personal notes on enabling/disabling auto start of Mysql and Apache2 on boot (or other services for that matter). Also on how to start/stop these services after boot. The notes are as they are. I hope you find them useful.
All this is done through a terminal. Open one from the Gnome GUI with:
Want to see what memory is fitted to your laptop or PC? Or if your machine has any vacant memory slots? Or maybe just to see what the speed and type of memory you already have and where it is?
Here’s my personal notes (wordpressed up) on reducing video file size using tools on an Ubuntu Linux Distro.
Last post (here) I showed how to change the format of video files from (say) mp4 to (say) mpg. That’s all fine for converting files. But what if you want to crush down your mp4 or mpg file and make it smaller?
(** NOTE: avconv was discontinued after Ubuntu 16.04 so this may not be helpful if you are running a later version. New post soon)
Here are my notes on how to convert video files between mp4 and other file types on Ubuntu. Especially between mp4 and mpg but avi and wmv can be used too.
There are a number of GUI converters in Linux but I’ve always found the command line converters the best. In fact most of the GUI solutions are just front ends on these command line driven converters. GUI tool winff isn’t bad but using command line tools (either avconf and ffmpeg) give you more options.
Here’s my personal notes on restoring a Ubuntu (or other linux distro) wifi connection that has gone missing. Maybe they’ll be useful to you too.
Sometimes when Ubuntu comes out of suspend or even after booting from power-on the wifi connection disappears. Usually the little triangular wedge on the task bar is empty. Usually this is easy to fix.