Avoiding JSON Error with Gutenberg Block Editor

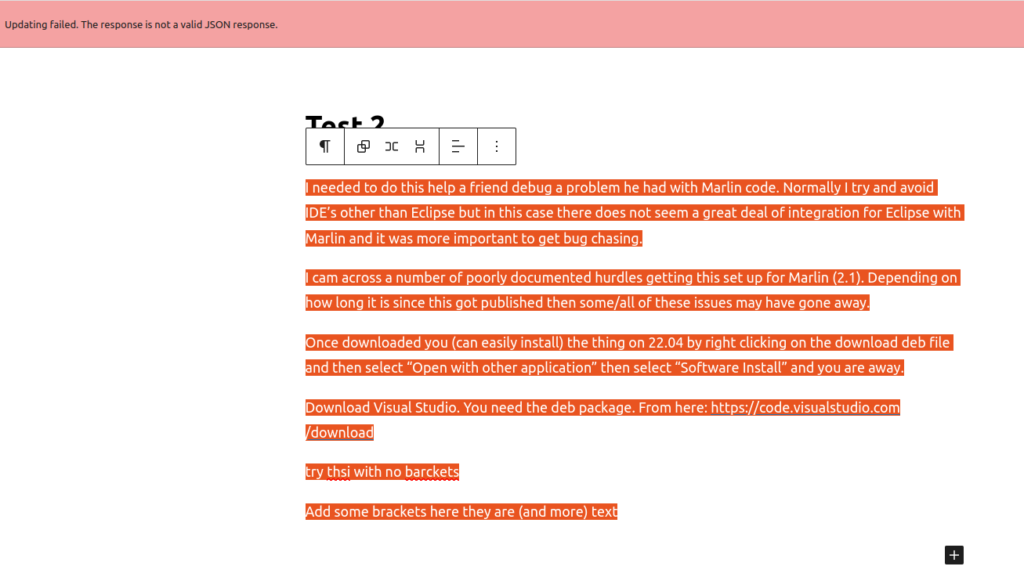
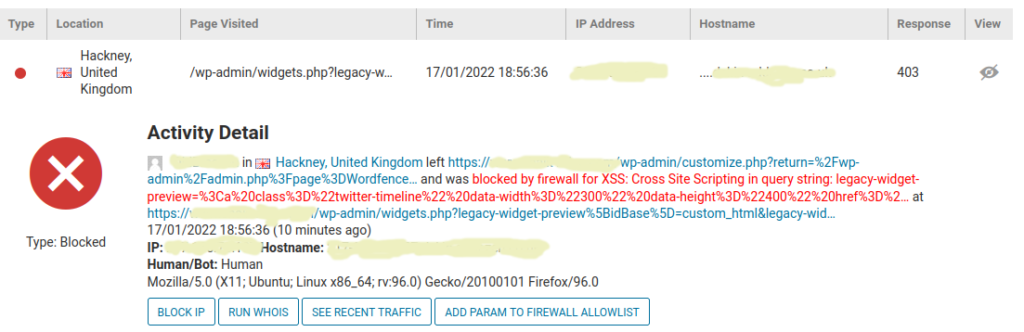
If you are using the Block editor on WordPress also called Gutenberg and you’re getting the following JSON error with a red banner when you try and save a post:

The Dreaded Red banner

This may be of help. To call it a fix is a bit too enthusiastic. It is more of a Kludge but it got me out of a hole and it may help you. No guarantees though. If you want to read about the whole sorry saga that led to this post there this earlier post of mine here. This is based on what I learned there (the hard way) and is recorded in that post.

Background

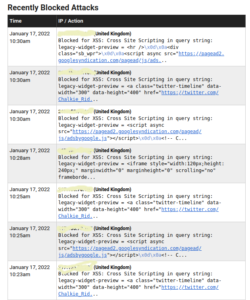
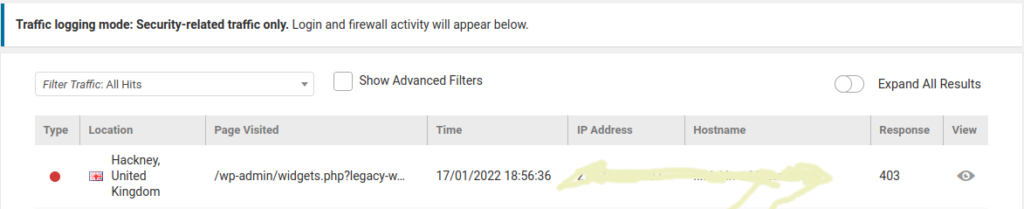
The problem is nothing to do with Gutenberg or WordPress but is due to security rules on your host that veto the JSON update because in certain circumstances the data held within the JSON transfer (aka you blog post) will look suspiciously like an attempt at hacking your blog.

So this is in essence an incompatibility between Gutenberg and (usually) the Apache2 Modsecurity module on your host. Or rather the rules used to drive it. Here’s a great description by a lady far, far cleverer than me Fixes for Update Failed Not Valid JSON Response in WordPress

One Way forward that avoids this Kludge

It is possible to avoid this JSON Error with Gutenberg Block Editor by getting your host to modify it’s modsecurity rules for your blog by disabling certain rules for your site by whitelisting anything coming from your home/work URL for your blog URL.

Obviously though this entails you raising a ticket on your host and then persuading them to accommodate you.

As well as that they generally need a static URL to associate with the rule waiver. So if you’re URL is likely to change or you need to do work on your blog from different locations this will be a pain.

So I thought I’d see if there’s anything that can be done about it without whitelisting.

Itemising the Problem

In my last blog post I pointed out that the problem appeared to be caused by having round brackets with text in (like this). Here’s a summary of what I found:

1. Having round brackets (either with or without text in between them) BEFORE any links/images caused no problem.

2. Having round brackets with text in (like this) after a link ALWAYS caused a problem UNLESS there were a pair of empty brackets – like this () between the link and the populated brackets.

3. Including an image SOMETIMES (more often than not) causes the same behaviour as a link aka a JSON error. Again a pair of empty brackets was required to be in the post after the image but before a populated pair of brackets to get the thing to save.

JSON Error with Gutenberg Block Editor: The Fix (or Kludge)

The thing I have found out (at least on my rig) is that it does not matter where the () occurs just as long as it is before any populated brackets. First of all I placed them in text (ugh! Ugly). But then I had an idea. Why not place it in an html comment? An html comment is invisible in the rendered post and is easily added along with text.

Take a block with a link in it you’ve added to Gutenberg. If you look at the html it looks like this:

<p>some text here<a href="https://code.visualstudio.com/download/">This this link</a>more text</p>

So lets add an invisible pair of brackets as an html comment like this

<p>some text here<a href="https://code.visualstudio.com/download/">This this link</a><!--()--> more text</p>

Job done.

Similarly for an image..

The html looks like this:

<figure class="wp-block-image aligncenter size-full"><img src="http://testsite1.thistestsite.co.uk/wp-content/uploads/2023/10/predicted-disasters.jpeg" alt="see what happens here" class="wp-image-14"/><figcaption class="wp-element-caption">Plus a caption (here) it seems</figcaption></figure>

Change it to look like this.

<figure class="wp-block-image aligncenter size-full"><img src="http://testsite1.thistestsite.co.uk/wp-content/uploads/2023/10/predicted-disasters.jpeg" alt="see what happens here" class="wp-image-14"/><figcaption class="wp-element-caption"><!--()-->Plus a caption (here) it seems</figcaption></figure>

It seems that if the addition of the empty brackets goes anywhere else it triggers an error in the block editor. So you will be forced to have a caption field – even if it is empty. It also means you MUST NOT have populated brackets in the alt text field.

Modifying the HTML in Gutenberg

The need to have these empty brackets means that you need to modify the html within the Gutenberg editor before it will save. This though is easily achieved.

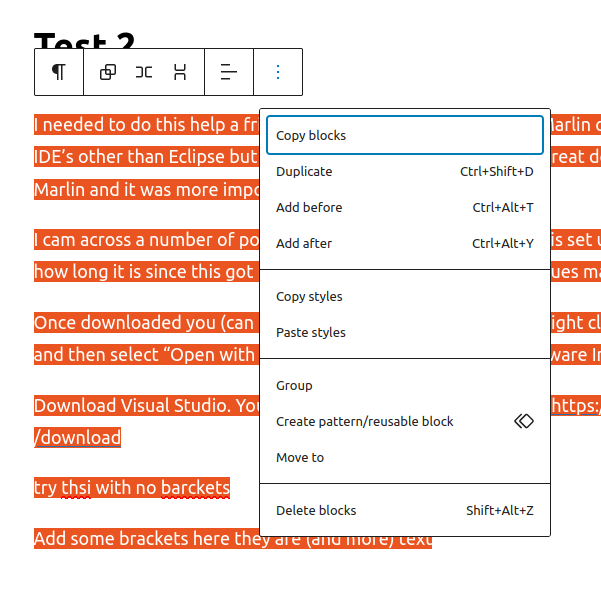
For links: Select the block containing the link that’ll have text plus link or maybe just a link. Click the vertical three dots on the right hand end of the controls. Select edit as HTML. Add the html comment containing only a pair of empty brackets immediately after the link terminator ( that’s the </a> ). What you need to add is this:

<!--()-->

For images: select the image then select edit as HTML as above. Add the <!– () –> in front of the caption text. This means you must have a caption field – even if it is empty. You can trigger the caption field by just adding a space or any temporary text then when editing the html remove the temporary text and add the <!–()–>

That’s it. There may be many other block types that will suffer from this problem but these are the main two and if (like me) they are more-or-less the only ones you use other than headers and paragraph blocks this may work for you too.

This though is ugly. I’m not wildly happy about promoting it as a fix because at best it is a work-round or a Kludge if you want to be brutally honest. Also it works (for me) today. It may not work tomorrow.

But if you are brick walled by this problem it may be a (temporary) solution. I know it sounds crazy. But there it is.

Hope that helps.

Chalkie.

WordPress: Updating Failed. Not a valid JSON response.

I was having a hell of a time writing a post. The damn thing just would not save.
I either got a warning message (in red!) “Updating failed. The response is not a valid JSON response.” (see screenshot below) or I got an message saying saving had been successful but no little black pop-up confirmation box. Either way the post had not saved. Repeating the operation just ended up with the same result.

Red banner announcing Not a valid JSON Response
This appeared at the top of screen when I tried to save the post

() – notice these apparently pointless empty round brackets here. They are what allows this post to be saved! More in a minute

In fact the first few times I got the red box then it was as if Gutenberg (or whatever triggers the warning) got bored telling me. So then I got no red warning BUT the post was not saved. If, after a failed save I tried to leave the block editor it warned me that I had unsaved changes. Changes I sadly could not save. (more on a work round for that in a minute).

The Finger Points at Gutenberg ()

I use Gutenberg. Aka – the Block editor. I forced myself to move over to it from the Classic editor a couple of years ago and I now don’t want to move back. BUT.. this is a show stopper! I think I had just updated to WordPress 6.3.1. Whether that is the cause, as of yet, I don’t know.

I did the inevitable Googling of “Not a valid JSON Response” and tried all of the suggested fixes on this link and on this link.

() – notice these empty brackets again!

These fixes entailed me cocking up all my plug-ins which (I hope) are now back to as they should be. But none of the options fixed my problem.

Just to add to the weirdness it appeared that the problem ONLY affects posts. Not pages. I also picked up on a couple of nebulous statements about “brackets” (see second link). Nothing clear. But it was all I had.

This below is not really a fix but it may-be is a work-round for you if you are in the same hole as me. It’ll have to do until I figure out a proper fix. Notice – even subheadings need the damn brackets!

Background and saving what you have ()

The first thing to realise about the block editor is that it is NOT running on your server. It is a Javascript application that is running in your browser i.e. on your computer. So until it or you does an update to your website the data is local. If it cannot communicate correctly (using what is known as the REST API) with your server then you cannot add/update posts on your server. That’s what’s happening. Your (my) post data is not getting out of the PC. The “Not a valid JSON Response” means it cannot upload your post.

So being in the position that I couldn’t save my shiny new post to the server the first thing I wanted to do was make sure I got it backed up so I didn’t have to sweat over entering all again (for a third time). so I’ll start off explaining how to save an unsaved post that will require minimal effort to re-enter it if necessary. Skip this if you just want to go to my work-round.

Saving Your Post Locally ()

I had entered a whole post and had not noticed the failure to update. So the server had about a third of it. I put it down to some crazy key press or whatever and binned the defective post and started again. Same result. I was not keen on the idea of losing it again! So I didn’t close the tab on Firefox (remember: this is running locally). After some experimentation I found the best way to save the thing was to ignore the title but highlight the rest of the post. When you’ve done that the block editor controls appear as here at the top of the post text.

Highlighting all of post to save.

() – It’s those darn pesky empty bracket again!!

Select the three vertical dots and then “Copy Blocks”. This copies the post as html. Then open a text editor and paste. You get this. You can also do a straight forward normal copy (or ctrl C) but this just gives you a textual copy and you’ll lose all the formatting.

Using Copy Blocks to save post

() – It’s those darn pesky empty bracket yet again!!

Why it’s better to use Copy Blocks ()

Using copy blocks means you can easily recreate the whole post in the block editor with a couple of clicks (even though it still wont save to the server until you fix the issue). You simply copy the text from the text editor and paste it into a single block in the Gutenberg block editor. Gutenberg works it all out.

So having saved the post I could now poke it around and find out what was wrong. After much experimenting this is what I found was my problem.

So.. The Problem : In Essence

I had an link (in my case to the Visual Studio Code download site) – this was fine!

BUT… after the link, in a different block I had a pair of round brackets with text in between them.

I kid you not. That was it.

The Problem Explained – as far as I can ()

The brackets (with text between them) broke the REST API and the post wouldn’t save. hence the “Not a valid JSON Response” banner. But this breakage ONLY occurred if there was a link somewhere in the text before they appeared. I could put round brackets wherever I liked after the link IF (and only if) the first pair of round brackets after the link had nothing in them. I found I could also put brackets anywhere in front of the link and it was fine. In writing this I just found that sub headers ALSO need brackets round them.

So, I am sure that this is a new problem that has been introduced sometime in the last 6 months. It could be in the Block Editor, the RestAPI, my security or the web-host security being over-reaching in its paranioa. I’d put my money on the last option as I have seen a few other folk complaining on Google about similar (though not the same ) issues all based around web host security. But it is just a guess and frankly life is too short and I’d suspect that this will be fixed soon.

I’d suspect that the security code checking the post update is seeing the URL then brackets so it is assuming it is trying to do some illicit function call to the “function” in between the brackets and blocks the update. i.e. its a bug in the hosts security code. Just a guess though.

Working Round this Nightmare ()

I’ve worked on this a bit more and have a temporary fix incorporating the info I gained from the investigation described above. It’s less of fix more of a work-round (or even a kludge) and there’s no guarantees it’ll work for everyone but it is described in this later post: Avoiding JSON Error with Gutenberg Block Editor. Below is my preliminary attempt predating the above link post..

My “solution” or work-round (for what it is worth – which isn’t much) is either:

Don’t use any round brackets after putting a link or image (maybe) in a post (square brackets appear to be fine).
Or Don’t use any links or images (hardly practical)
Or, (my preferred from now on) put a pair of empty brackets in the text just after the inclusion of a link or image. AND you also need them on the following header. (Arghhhhhh!)

If you look in this that’s what I’ve done here. Here I’ve left them undisguised them but normally I’d hope to bury them in some way.

Hope that helps.

p.s. If you know of a better fix/solution/work-round please tell me. This drove me mad.

p.p.s The next thing I am going to try is removing the spurious brackets after the post is up on the server. I don’t think this will work for links but I suspect they can be removed for images as the image will now be up on the server not on the local machine waiting to be uploaded.

See this later post for a more coherent description of what to do to work round this issue

Here’s the rest of my WordPress & related posts

Permalink 404’s & Response is not a valid JSON response

I first came across this WordPress cum Apache2 Permalink 404 problem back in 2018 and described a fix here. Unfortunately I had forgotten all about it and even though the damn fix was sitting right there in front of me I had to re-endure all the grief and suffering again. However during this grief and suffering I came across another nasty little feature that seem associated with the new Block editor. (previously I was using the classic editor) Namely after changing the permalink I got “Updating failed. The response is not a valid JSON response.” whenever I tried changing a post.

I previously wrote up a fix for the 404 problem when you change permalink style here. While it is much the same as this it is here, it is four years old and pre-dates the Block editor. But it may be worth a look along with this in case it somehow explains thing differently and more usefully for you.

This problem (in total) probably only applies to situations where you are using your own Apache2 server. But it may apply in part if you’ve not got the .htaccess file properly configured on some hosted webspace. I would imaging that if you are using a hosting service then it would be highly unlikely you would need the bit below about a2enmod.

I must add that this problem (2nd time ) almost beat me to death. It appeared to be intractable. But that was only because I had failed to configure Apache properly. (or read my own f**king notes!). I didn’t think (until now) that the two issues in Permalink 404’s & Response is not a valid JSON response” were related. But I think they are. Either that or I fluked a fix to both.

Here’s What Happened

Basically I installed WordPress with no issues. I built a child theme, again with no issues. I could build pages and posts using both the Gutenberg and the Classic editor. BUT I could only use the “plain” default URL settings for both posts and pages. If I changed it under settings→permalinks to something a bit more useful I’d end up with a 404 not found.

In the Gutenberg editor I also noticed that I often (always?) got a red bar with the following error message in it..

“Updating failed. The response is not a valid JSON response.”

So if you are a getting this then maybe it is tied up with this permalink problem. Obviously before I started using the Block editor and before I fixed the permalink problem I didn’t get it. After I fixed the permalink problem in apache2 then the JSON invalid response issue I was getting in the Block Editor disappeared too.

So, What was I getting with the unconfigured Apache?

I changed the permalink setting away from the default. Then in the editor the new URL for the post/page looked correct. But it just did not work. It always returned 404 Not Found.

Here’s what I did to solve this (for me) They were not done in this order but I think that this is the best order to do them in. It may also be that not all these steps are needed.

Here’s the Fix

1. In etc/apache2/apache2.conf: change AllowAll=none to AllowAll=All. I did this for all four settings but I think that only the one related to /var/www is necessary. You change all 4 to get it working back out the ones you don’t need by trial and error. I’m pretty sure you only need /var/www

Doing this enables the .htaccess file (more in a minute). Without doing this .htaccess file is simply not read.

2. Turn on mod_rewrite

sudo a2enmod rewrite

(this was the missing bit that killed me for two days. This MUST be done if it’s your own server)

3. Ensure the .htaccess file exists and holds the following code (or similar. In my previous post I used a slightly different incantation but never mind – the standard wordpress version is fine)

<IfModule mod_rewrite.c>

RewriteEngine On

RewriteRule .* – [E=HTTP_AUTHORIZATION:%{HTTP:Authorization}]

RewriteBase /

RewriteRule ^index\.php$ – [L]

RewriteCond %{REQUEST_FILENAME} !-f

RewriteCond %{REQUEST_FILENAME} !-d

RewriteRule . /index.php [L]

</IfModule>

I gather it is possible to completely dispense with the htaccess file and simply do everything in apache2.conf. But most people only host a site to develop it and then upload it to a host provider where use of a htaccess file is not optional. So you might as well do it in your prototype code too.

Make sure you htaccess file is writable by www-data as well as the owner.

Restart apache2 after the mods. with sudo service apache2 restart

(or whatever other incantation you like)

That’s it.

Hopefully the permlinks should now work and those hideous Permalink 404’s & Response is not a valid JSON response messages will be history too.

Lost Root Password to Mysql and Phpmyadmin

Yes. I committed the cardinal sin. I lost my root password to mysql and phpmyadmin. Consequently I could not log in as root in order to change the permissions for a user. Of course I hadn’t noticed I had lost the damn thing because normally I never-ever log in as root to anything.

It was only when I need to fiddle about with other users when I typed in what I thought it was – only to find my memory was crap. Of course, I had written it down somewhere safe. I always do. The problem was (crap memory again) I couldn’t find where.

I always obfuscate saved passwords – just in case some nasty person raids my desk and steals my documents. So it is probably staring me in the face. On the plus side I suppose it shows my obfuscation works pretty well. Hey Ho.

Check Your Mysql Version

Here’s what I did to reset the lost root password to mysql and phpmyadmin. This worked for me. I’m running mysql ver 8.0.30 Check this with:
mysql -V
Mine come back with this.
mysql Ver 8.0.30-0ubuntu0.20.04.2 for Linux on x86_64 ((Ubuntu))
This may not be compatible with all other versions but I expect it should be with this or later versions.


This method (after trying and failing with many others) is based largely around this post on devanswers.co. So major Hat Tip to them. There are a few extra steps here mainly surrounding clean up before actually changing the password. But if you are running mysql 5 you would probably be better off at devanswers as they deal with that earlier version as well as mysql 8. But you may still want to do the mysql killing and clean up as described here.


If, like me you got to this point after many failed attempts to fix this we need to check what sort of dismal state we are in.

We need to kill mysql. Make absolutely sure it really is dead. It’s worth checking that you haven’t got multiple versions running. This may (especially) happen if you’ve been faffing around with other failed attempts to crack in to mysql (like I had).

Cleanup: Kill all Mysqls

sudo ps -A | grep mysql – if this shows you one or more mysql or mysqld processes running then….
sudo pkill mysql
sudo pkill mysqld
sudo ps -A | grep mysql
– make sure this time nothing comes back.


Now we have to make sure the following directory (and associated user) exists. It may well not.

If you try and push ahead without having this directory properly set you will get something like this:
chalkie@chalkies-box:~$ mysql -u root mysql
ERROR 2002 (HY000): Can’t connect to local MySQL server through socket ‘/var/run/mysqld/mysqld.sock’ (2)
[1]+ Exit 1 sudo mysqld –skip-grant-tables

If you already have this error message START AGAIN. Go back and check ALL instances of mysql are dead THEN create the directory as below.


ls -l /var/run/mysqld
If it is not there and the owner is not mysqld:mysqld then…
sudo mkdir /var/run/mysqld
sudo chown mysql /var/run/mysqld

check it again with
ls -l /var/run/mysqld


Now restart mysql in safe mode like so..
sudo mysqld_safe –skip-grant-tables&
You’ll get something like this back..
[1] 100757
chalkie@chalkies-box:/var/run$ 2022-08-21T12:57:00.853461Z mysqld_safe Logging to ‘/var/log/mysql/error.log’.
2022-08-21T12:57:00.907704Z mysqld_safe Starting mysqld daemon with databases from /var/lib/mysql


now we can login as root like so…
sudo mysql –user=root mysql

You now should be logged in as root the prompt should now be mysql>


Now you are logged in as Root

From here you can now do all sorts of damage. Or even change the lost password for root as so..

First remove the old password with this…(notice the trailing semi colons and ignore the mysql> prompt)
mysql>UPDATE mysql.user SET authentication_string=null WHERE User=’root’;

mysql>flush-privileges;

mysql>ALTER USER ‘root’@’localhost’ IDENTIFIED WITH mysql_native_password BY ‘a-new-pw-i-promise-never-to-forget’;
mysql>flush-privileges;

And that’s it. Log out and kill the safe mode mysql process

mysql>exit;
sudo killall -u mysql


Now restart it:
sudo /etc/init.d/mysql start
CHECK the new password for root works by logging into mysql and/or phpmyadmin with it!!!

I hope that helps. My other Ubuntu style fixes are listed HERE

Wordfence XSS Cross Scripting Error for Admin: Fix

I had had an annoying problem where I’d log into one of my WordPress sites, then attempt to change the side bar and remove (say) a block of code that pulls in an iframe from another site (i.e. Twitter or Amazon or whatever) I got blocked by my security Wordfence plugin with a XSS cross scripting error. The actual site works fine it is just the admin cannot change anything. I first fixed this back in 2020, then forgot about it. I then changed my admin URL (i.e. broadband provider) and it re-appeared. Now as a penance I’m writing it up.

A potentially Unsafe Operation Screenshot. XSS cross scripting error.
Each blocked widget entry gets one of these
Wordfence Blocked Attacks email snippet listing multiple XSS cross scripting errors
Yes. I tried several times! And it blocked each and every one of them

The Problem:
When I tried and change anything using Appearance → Customise in WordPress dashboard the item I want to change gets blocked with this “Potentially Unsafe operation” on the left:

Later I receive my Wordfence email outlining Wordfence activity and I get this sort of thing in the “Recently Blocked Attacks” section.

The IP address (blanked out in the “Blocked Attacks” image) is my own. Wonderful though the Wordfence plugin is (and it really IS wonderful!) it is blocking me from changing anything! Which is rather sub-optimal, although I can still post.

The fix is simple – when you know where it is in the Wordfence plugin.

Select the Wordfence top level menu item in the WordPress Dashboard. Then select the “Live Traffic” Tab. You will see a list of blocked activities. Identify the one that has your IP address on it and then click on the “eye” on the far right of the summary line.

Traffic Logging Snippet. Blocked Admin for XSS cross scripting error
Notice the “eye” on the far right under the “View” column

After you have clicked the “eye”, you then get this.

Expanded Traffic logging snippet detailing XSS cross scripting error
Here’s the expanded entry. You need to get to here then you can whitelist your own URL

Select the “ADD PARAM TO FIREWALL ALLOW LIST” Then you are done! Your false Wordfence XSS Cross Scripting Error should go away.

You can now check that this has been implemented (and also exactly who is allowed to bypass the firewall) by clicking on the “All Options sub-menu item in the Wordfence menu in the WordPress dashboard.

In the “Rules” section make sure “whitelist” is on. (It should be) Then go down to “AllowListedURLs” and expand it. Here you should see your newly whitelisted URL. You can turn it (and any other ones) on and off from this menu too. I did not need to log out/in for changing enable/disble to work but you may need to.

Anyway hope that helps.

Locked in Maintenance Mode? Getting a WordPress Site Back Up.

WordPress is a complex beast and occasionally an update (automatic or otherwise) will fail to take the site out of maintenance mode after it completes. Most people never actually see their site in maintenance mode. It’ll look something like this below though you may not have the fancy image – just a battleship grey background.

Continue reading

My Domain Property Wouldn’t Verify in Google Webmasters. Here’s Why.

Google Webmasters (and it’s Google Search Console ) provides you with a Domain property verification string to allows you to get the full search data going to your site. The Domain Property shows all the search data for your site in one place rather than (say) separate data for https and http access. It is worth using.

Continue reading

WordPress: Adding Google Analytics Without a Plugin

There are many Google Analytics plugins for WordPress. Most also give you some form of display of this data in the wp-admin area. But you also get the endless plugin promotions trying to get you buy the enhanced version. While I don’t mind (that much) people trying to sell their wares (especially when I’m using a free version) sometimes it just grates.

So if rather than using a plugin you would like to just code and forget it, you can simply add a function into a file in the site child theme. Then you can check it works and forget about it. That’s what I do.

Continue reading

Backing up a One.com WordPress site

It is a good idea to always keep a recent local WordPress back up copy of your one.com hosted website. One.com is one of the more reliable hosting companies and they offer a backup facility for customers. But even so, if you have a recent local copy of your website safely stored on your hard drive there is no question about your ability to restore your site should the worst happen.

Continue reading

Creating a local Backup of a Hostpapa WordPress site

Here’s my personal notes (with an intro) on creating a local backup of a Hostpapa wordpress site. Maybe they’ll be useful to you too.

It is a good idea to always keep a recent local back up copy of your Hostpapa website. You can use Hostpapa’s remote backup facility for convenience as well, but if you have a recent local copy sitting there on your hard drive you know exactly where you stand.

Continue reading

Local WordPress Install: Posts return 404?

If you have just set up (say) a local Apache2 server and have a local wordpress install so you can debug your website locally you may find (like I did) that while the main webpage comes up fine, when you click through to anywhere else on the site it returns a 404 Not Found error. Even though you know the page/post is there and it shows up OK in the wp-admin section.

For me it turned out that I had not enabled an important plugin on Apache2 to allow permalinks to work. The missing module is called mod_rewrite. It is simple to fix.

Continue reading